Friday, August 27, 2021

Crushing on Cardstock - Pleated Technique


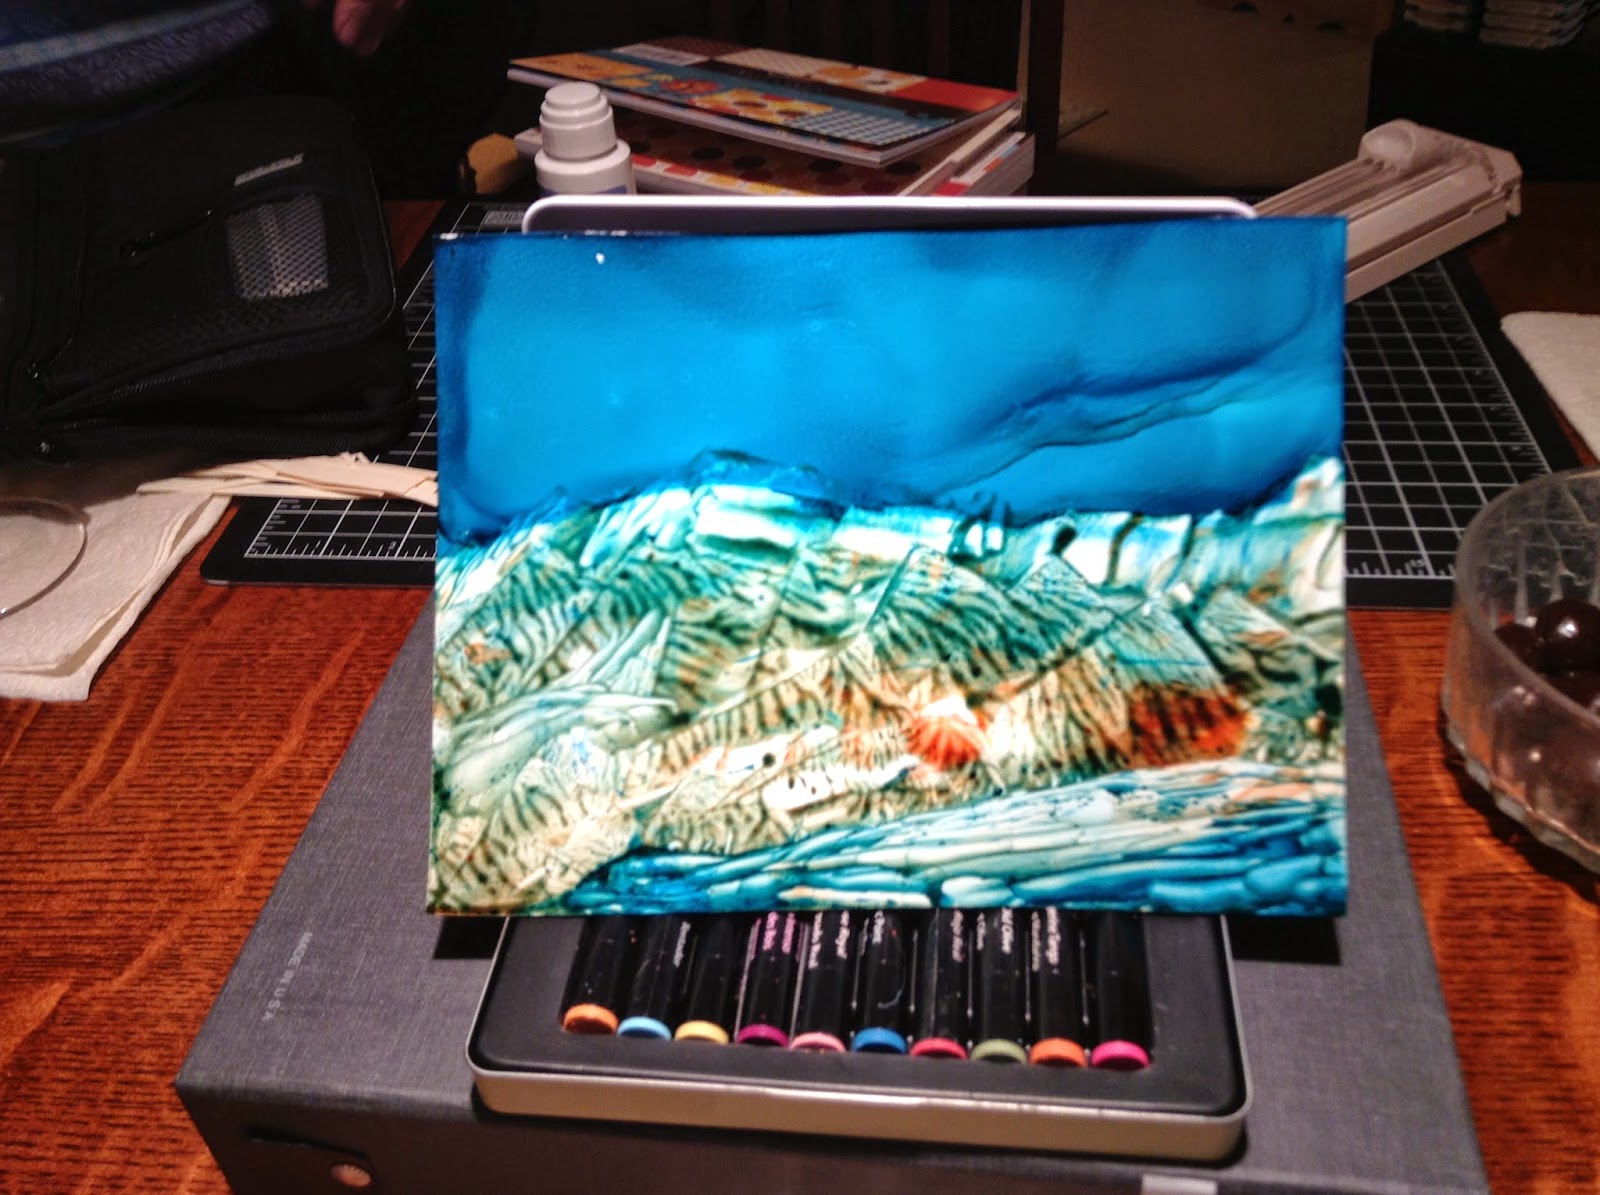
Here's my card using the completed technique. Not my best effort and I'm not sure I like how it looks from the side, but it sure was a fun technique to try!

Crushing on Cardstock - Miscellaneous Scrap Storage


Here's a pic of my scrap storage for all my miscellaneous cardstock. Posting here so I can share in the class gallery. 

I also have patterned paper scraps in here too. This system has worked SO well for me and has really made my cardstock and patterned paper go a LONG way!

I cut any scraps leftover from a project or cardmaking session into my most used sizes (4.25x5.5, 3x4 and 3 and 4 inch squares). I throw away anything else that cannot be cut to one of these sizes. 

I used to store my scraps in hanging files and didn't throw anything away. What I found with that method was that all the little scraps feel to the bottom and made the hanging files really fat and awkward to sort through. This new system - which I've been using for almost 5 years now - really makes things nice and easy for me. Cutting up the scraps is also a nice things to do when I don't have any crafting mojo but want to hang out in my craft room :-)

Crushing on Cardstock - Cardstock Storage


Thanks for the bonus videos that were in the Crushing Cardstock class from Online Card Classes this morning! 

Several years ago I did a version of Jennifer McGuires’s method. I put all my Stampin Up and Gina K cardstock into 2 groups and then used magazine holders with tabbed paper dividers to organize by color. I keep the scraps of those colors in page protectors with the full sheets. It has worked SO well!

The rest of my cardstock was just a few pieces here and there of miscellaneous vendors – back from my beginner days when I was buying single sheets from my local scrapbook store and the big chains. So I have all my miscellaneous (“vendor unknown”) sheets in a 3rd set of magazine holders without paper dividers and instead just sorted in rainbow order. Those scraps from the miscellaneous sheets are cut down to my most used sizes (4.25×5.5, 3×4 and some 3 and 4 inch squares). Once cut, I keep them in an open photo storage box (picture in next post) with dividers by color categories. I have found I’m using my scraps SO much more! I even have a Pinterest board with a bunch of card ideas using scraps. And now this class has given me even more ways to use some of the scraps. All this makes my cardstock go a really long way!

All my specialty cardstock is in a drawer. That really needs to be organized soon as I sometimes forget what I have or don’t realize I’m getting low on something. Realized this week as I was taking this class that I only had one sheet of vellum in my whole craft room. Aaaaccck! SSS has now been placed :-)

The only thing I haven’t done is to make a swatch ring. It seems like I don’t have enough cardstock to really make that useful. Although I do have to admit that I bought the swatch ring from Stampin Up and I do use that often to find new color combinations. So maybe I should give it another thought and do one for my GinaK cardstock and any other I seem to buy in larger volumes?? I haven’t swatched my inks either but recently put that on the ToDo list as I seem to be constantly working to find good color matches – especially for those “vendor unknown” sheets.

Here's a better closeup of my dividers and scrap storage for the SU and GinaK papers. . .


Tuesday, August 24, 2021

Crushing on Cardstock - Card 2


Card 2 from the Day 1 class turned out to be a challenge too when I realized I cut my starting square too small and then had to adjust the width of the strips so I could get enough of a patter out of the design. I originally intended to mount the dire cut sentiment in the center but sadly there was a missing piece of the pattern in the lower left hand corner. So I decided to use the sentiment to hide it. Yet another "creative deviation"! I actually like it better as it really shows off the pattern of the technique. 

Stay tuned! More to come!

Crushing on Cardstock - Day 1 Cards


Since summer vacation plans haven't turned out quite as I had hoped, I treated myself to a week of cardmaking. I'm taking the "Crushing on Cardstock" class from Jennifer McGuire and Kristina Werner's Online Card Classes. I'm only on the 2nd day and already it's been quite the creative adventure.

I had caregiving duties with Dad yesterday so all I was able to accomplish was watching the videos and getting the cardstock picked out and cut.

Man! Did they give you a lot for the money. Day 1 of class had 9 card techniques. And today, Day 2 was about the same. I hit the craft room early this morning ready to catch up. Going through the class information and giving the techniques a try has made me realize I must be the slowest cardmaker in the world. It's now getting close to dinner time and I've only finished 2 of the cards from Day 1 :-(

Card 1 above was full of trial and error. I didn't have any word dies that matched what I wanted to do so I tried a few from my Silhouette files. I messed up a bunch of the cuts trying to get a word shadow and finally gave up. I settled on mounting my word on circles. But sadly I messed those cuts up too. I was getting tired so I just cut the bad parts of the circle off. As it turned out it was quite a nice "creative deviation"! I really liked how it turned out.

Card 2 below was equally a challenge when I realized I cut my starting square too small and then had to adjust the width of the strips so I could get enough of a pattern out of the design. I originally intended to mount the die cut sentiment in the center but sadly there was a missing piece of the pattern in the lower left hand corner. So I decided to use the sentiment to hide it. Ditto on the "creative deviation"! I actually liked it better as it really shows off the pattern of the technique.


I have watched all the videos from Day 2 and think I have a plan. Hopefully there will be a little more crafty time after dinner and I can get at least ONE of the Day 2 cards done without too many mistakes and too much creative drama :-)

See you back here tomorrow.

Sunday, January 8, 2017

Gift Boxes

Another post sharing some of my Christmas crafting from the last couple of years.

Apologies in advance for some of the bad photos. Me and my shaky hands you know :-)  ]


Allan gives his nieces and nephew a gift card for Christmas each year. I've always had a problem with just sticking a gift card in an envelope and instead have searched for ways to package the gift card in a fun way. *Val - I think you had the same thoughts when you gave you nieces and nephews their Christmas cash. I seem to remember some origami for dollar bills. You'll have to refresh my memory on all the creative ways you came up with.

One year, we enclosed it in a puzzle box that they had to solve before they could get to the card.  Another year we wrapped it with flat pieces of quartz we bought at the Renaissance Art Fair.

This year (2014) I thought it would be cool to stand the gift card up in a box fill of M & Ms and make each box a personalized keepsake that would fit for each one.

The one above is for Alexis, the youngest of the Mozingo nieces. She seems to love the bling so I did hers in bright pinks and black with a really cute monogrammed "A" I cut out of SU glitter paper with my Silhouette.

Allan graciously agreed to do all the decoupaging. So now Cricut man has earned the title of the "King of Mod Podge".


After multiple coats we started loading up the M & Ms and tucking in the gift cards. . .


This is Abbey's box.  Another "A" monogram with some bling and a digital patterned paper in Tiffany blue - the color of her teenage bedroom.


This is Caroline's box - done up in her high school colors with some clip art I found of the school's mascot.  That happens to be Allan's alma mater - the New Bern bears.


Next is the box we did for Kaitlyn, the oldest of the nieces.  She's now a cosmetologist.  I found a really cute clip art in some really hip colors.


And last but not least if the box for the only nephew in the bunch - John Ross.  He loves South Carolina and we just found out a few weeks ago that he was accepted there.  So his box was one that I hope will be put to good use in his dorm room next year.


Thank goodness for Pinterest and all the good ideas floating around out there.  Stay tuned for posts about what I did for 2015 and 2016. Not sure what next year will be but I'm sure I'll come up with something.!


Friday, December 30, 2016

Treat Bag Toppers


Backing up a little in time to show you a few things I made last Christmas.  This is a treat bag topper that I made for my next door neighbor's annual cookie exchange.  Most who know me know that I don't can't bake so I've never felt right participating in the cookie exchange with "real" bakers.  Plus, I really don't need all those calories cookies in my house at that time of the year.  So I decided to tell Robin I'd only go if she agreed I didn't have to bake, didn't have to take any cookies home and told her that I'd papercraft something for my part of the exchange.

My new Silhouette Cameo really came in handy.  I found this really cute pattern for a treat bag topper.  I thought it would fit nice with the theme of the cookie exchange in that the other ladies could use it to package up their cookies for gift-giving.  I used a Stampin' Up Christmas paper pack which came in so handy because everything coordinated.  I made 25 of them and dropped the topper down in a cellophane bag.  I put a store-bought molasses cookie in one of them so everyone could figure out how the bags would work. I have to tell you they were a big hit!  I may be doing it all over again next Christmas for the folks at work.


Wednesday, November 25, 2015

So Many Reasons to be Thankful


I've been itching to try my hand at watercolor and this card design seemed the perfect way to get started.  I found the inspiration for it here.

I did one other version of it as part of my commitment to try to use up my stash. I've been thinking about how hot eyelets were when I first started cardmaking and how many I have and how neglected they are. So here's how I modified my design to use up a few. . .


Would love to hear which is your favorite.

I hope you and your families have a wonderful Thanksgiving tomorrow.  I'm doing the cooking this year and feel so blessed at thoughts of having Mom and Dad here this year along with my neighbor family.  Life is feeling very full.  I'm grateful!


Sunday, November 22, 2015

Response of Peace and Love


Hi Gal Pals,

I'm finally getting some time back to do a little card crafting. Things with Mom & Dad are smoothing out some and we are beginning to settle into a nice rhythm. 

I just had to make a card last week and here's the reason why. . . .(the insert inside the weekly family newsletter). . . .

It was sad and scary to hear the news about the terrorism in Paris. When things like that happen, the only way I can make sense out of them is to remember my belief that the only way to heal from an act of hatred is to return it with an equal or greater act of love.  Apparently I’m not the only one that believes that.  There is a famous graphic designer/cardmaker I follow (Cathy Zielske) and she created the image on the front of the card and posted it for free as a way of putting thoughts of peace and love out into the world.  She wants to spread that intention as far as possible.  So I used the image for this week’s card and left the inside blank hoping that the family might find a way of sending the card to someone else with a thought or prayer for peace and love. Much love and peace to you all!

I just loved the color combination Cathy used - something I would have never thought of.  I started off with a bigger image and larger matting but ended up shrinking the image and matting so there was more white space.  It seemed more peaceful that way.

Here's my original version:


Any thoughts or comments about which you like better?

Hope all is well and that this Thanksgiving you include some prayers for peace and gratitude for loving family.

Tuesday, July 7, 2015

Digi Scrapbooking


I've been trying to make good use of the heat wave. Since I've been staying inside during the hottest part of the weekend days, I'm using the time to make my way through a couple of free online classes for Photoshop Elements. So here's my first practice page. The lesson was to take a "quick page" template and add your own photo, title and journaling.  I liked how it turned out and it was super easy!  And the class came with a package of the cutest digital supplies.  Looking forward to playing with those supplies a little more on other pages and even cards.

Even though I have Stampin' Up's My Digital Studio, I wanted to try my hand at digi scrapbooking with Photoshop Elements since there are so many free templates and supplies floating around the web. Turns out that was a good decision as I just found out that Stampin' Up no longer supports My Digital Studio (as of June).  That was kind of a bummer. I really liked that product.  It was easy to use and having everything match my real life stamps, papers and embellishments was a big plus.  From what I can tell, the application will still work but as new operating systems and versions of Java come out, there's a chance that it will stop working.  Guess I'll just have fun until then.

Hope everyone is staying cool.  See you back here soon.

Sunday, June 14, 2015

Joint Effort


This year's Father's Day card was a creation from both Allan and me.  Allan is always the photographer on our trips and took this really cool landscape shot of the wheat fields in Walla Walla, Washington when we went for our joint birthday trip.  I just loved the colors and the balance of the old barn against the rolling landscape.

I used some old Gina K Designs patterned paper and some scrap card stock.  Still whittling away at my scraps.  Also embellished with some blue Candies.  They add a nice touch without making the card too bulky for the mail.

This blog as been so neglected these last several months.  It isn't that I haven't been crafting - it's just that I've been doing in it fits and spurts.  And now with summer here, it's hard to justify being inside when it's so gorgeous out.  But I gave myself the gift of the day today for my birthday to do whatever my little old heart desired and it's been SO-so fun!

Hope to see you back here soon.

Monday, November 17, 2014

Sketches


I found a fantastic sketch site that I wanted to share today - Freshly Made Sketches.  This site has really quick and easy cards great for weekend inspiration.  I'm still stash busting and am now focusing on all the wonderful 6x6 paper pads I've accumulated over the years.  These sketches are making it really easy to do that.  

The Christmas card above is made with a BoBunny paper pad from last year I think.  

And this card was made with a paper pad from Stampin' Up.  I did a variety of sentiments from Happy Birthday to Thinking of You and a couple of sympathy cards.


I've been making 8 cards at a time which seems to be a perfect amount to take advantage of mass production without getting too board.

Hope you had a great weekend and have a great week ahead!


Monday, November 3, 2014

A New Project


Hi Gal Pals,

Back from Jacksonville.  Had a good time last week with Mom & Dad and the rest of the family.  Weather was spectacular!  So thankful to have the time with them.

And speaking of "thankful", I wanted to share a new project I'm doing with my mother this month - "30 Day's of Thankful".  It's based off something I found on CathyZielske's blog although there are lots of other papercrafters doing similar type things for November and Thanksgiving.  All in an effort to remember the joy of this month and the Thanksgiving holiday and not let it get lost in the big leap from Halloween straight to Christmas.  Plus after having been a little down in the dumps a few weeks ago, I was wanting to revive my daily gratitude practice to get me back on track.

So I downloaded the digital kit and was going to do the 4x4 mini album but then in talking with Mom and realizing we needed a better way to share our gratitude items long distance I decided to set up a new blog for the project.  I called it Cross Country Gratitude.  Click here to check it out.  We're only on Day 2 but already it's been a lot of fun and others in the family are joining in.

Hope you have a good day at work today.  With the Election Day holiday tomorrow it's going to seem like a Friday.  Now that's something to be grateful for!!!

Tuesday, October 14, 2014

It's Almost That Time of the Year Again


I was rearranging my Pinterest boards the other night and realized it's almost that time of the year when I need to pick out a few designs and get busy making Christmas cards.  I don't think I ever posted this card from last year (or was it the year before? - geez! time flies).  I loved how it turned out with the glittery snow on the roofs and the pine branches and gem berries.

Have you thought about what cards you're making this year?  Here's my Christmas board on Pinterest.  It's got a few new posts of things I've found recently.  And here's a really cool sketch challenge blog that I stumbled on a few weeks ago that has really nice clean and simple sketches with tons of samples.  

Enjoy!

Monday, October 13, 2014

Amazing!


Well Gal Pals, I took the plunge and bought the Silhouette Cameo!  I have to tell you it's pretty amazing!  It cuts "like butter" compared to the Cricut.  I was skeptical when I heard it would cut any font on your computer.  But it really does!  Here's a Creating Keepsake font called "Voluptuous" and how it looks in a Word document:


And here's how it looks after cutting it on the Silhouette:


Amazing! Huh?!!  Can't wait for another rainy weekend to play some more.


Thursday, October 9, 2014

Val's Alcohol Ink Tiles


What a perfect Fall day to post this picture of one of the alcohol ink tiles Val made in a recent Memory Lane class.  Isn't it bea-u-ti-ful!!!!

She shared her work during our get together last month.  It sounded like a fantastic class.  They took just regular white ceramic square tiles from Home Depot and used alcohol inks and techniques to create these different looks.  Aren't they fantastic?!


Sure do hope they offer that class again.


Wednesday, October 8, 2014

With Sew Much Love


As a contrast to yesterday's "beginners" page, here's a picture of my latest scrapbook page.  I think I'm starting to find my style.  Much like my cardmaking, very clean and simple, very linear.  The focus is on the story the pictures and journaling tell with splashes of fun with color and patterned paper.

This page is a tribute to my Mom and her amazing sewing talents and the amazing energy and love she had for raising her family.  

Although I don't really like my handwriting, I want to do a few pages that have my own handwriting on them because it feels much more personal.  I found that I loved the handwriting in my grandmother's scrapbook.  Somehow it made me feel like I knew her better.  So hopefully those that read my scrapbooks will feel the same.  But I find I have so much I want to say in the story that it doesn't always work to include the journaling on the page itself.  So the 6x12 pages are really working out nicely.


Here's a shot of just the journaling page.  I tried to include some dates in the descriptions of the clothes to help mark the times.  Since my old photos are dated I had to go to the web to find the general dates for "ponchos", "smock tops" and "bell bottoms".  Now that was a fun ride down memory lane!


Tuesday, October 7, 2014

The Beginning


I've been going back and photographing some of the scrapbook pages I've made so I can get them posted here as sort of a backup.  This one really tickled me.  It was my very first scrapbook page.  Well sort of. . . .

Even though I kept a scrapbook in high school, it wasn't quite the same as the scrapbooking we know today with all the beautiful patterned papers, sketches, embellishments, etc.  

My sister-in-law decided to be a rep for Creative Memories for a little while and I bought a bunch of supplies from her.  An 8.5 x 11 album, cardstock diecuts and stickers.  

I have to tell you when I look at this page it just makes me giggle with how goofy it looks compared to the scrapbook pages I'm making now.  

Because I switched to 12x12 scrapbooks a few years ago for my "event" and travel scrapbooking, I mounted the original page on some larger cardstock with yellow border trimming.  It wouldn't be a Sandy page if it didn't have yellow on it somewhere - she's all about the yellow :-)

Even though I'm not in love with the page, I love the subject matter.  It was Sandy's birthday and Thoryn and Abby came over to the house to celebrate.  We had such a wonderful cozy February afternoon.  Here's a couple of close-ups which helps make the journaling a little more readable when you click on the image:


It will be interesting as I post other scrapbook pages to see how my style has evolved.  Sometimes it seems like I'm still a beginner but when I look at this page as the beginning and compare it to my latest page (which I'll post tomorrow) I can see I really have grown.


Monday, October 6, 2014

Embossed Border


Hi Gal Pals!

I was catching up on my Gina K Designs videos and saw this one and wanted to share.  As part of my stash busting this year I've been looking for ways to use all my embossing folders.  I thought this technique was really cool.  And I absolutely love the simplicity of this card.

Hope you had a good weekend and today is a good start to a good week.  


Thursday, September 25, 2014

MDS Sea Shells


You can't really tell it from this picture but this was a one-layer card where I just "print screened" the image from My Digital Studio ("By the Sea Shore" stamp set) and printed it on the front of a card.  The print screen software I use - Gadwin - has a setting where you can create a shadow around the image.  It really really made this card look like the image panel was popped up on the card base. Talk about quick and easy!